
Step 1:
After installing Litecoin from - http://support.bitexchange.systems/support/articles/how-to-install-litecoin-in-your-server?ht_al=NTky
We check whether blockchain has started loading first
litecoin-cli getblockchaininfo

Leave it for sometime hours for the blocks to download.
Step: 2
Once the blocks are downloaded, you can verify by checking the Blocks and Headers count. If both numbers are equal, then it means the chain is up to date.

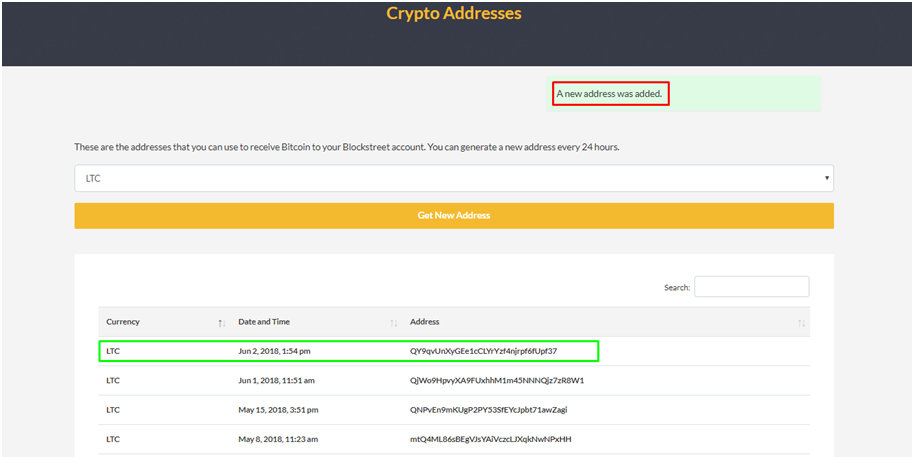
Step: 3
Navigate to “Crypto Address” Tab from Exchange frontend navigation bar and Select the coin LTC. Then Click Generate Address.


Step: 4
Once address is generated, You will see a green alert. Also in the Address table, you will see the address generated and date, time of the address generation.
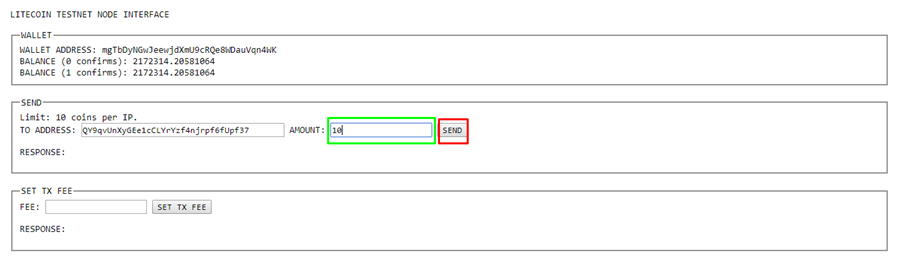
Step: 5
Copy this address

And Goto Litecoin Testnet Faucet - http://testnet.litecointools.com/
Paste the copied address and click recaptcha. Then click “Give me some coins” button.

Step: 6
Once you click “give me some coins” button, you will see a text above the box. It is the transaction id. Copy this and keep it in a note pad.

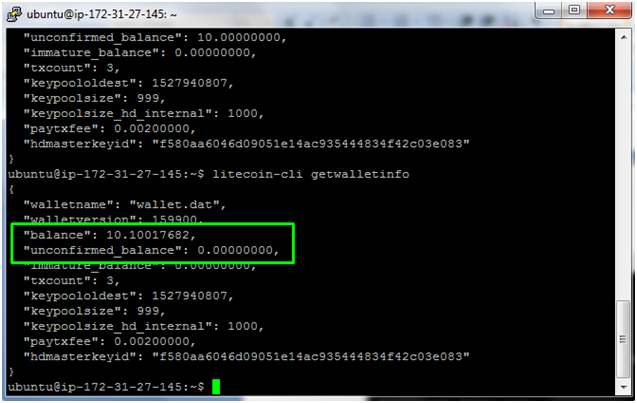
Step: 7
In the command line, type
litecoin-cli getwalletinfo
Here you can see the current Wallet balance and Unconfirmed wallet balance.
Unconfirmed wallet balance - When we transfer coins from testnet to wallet, with 1 confirmation the amount is sent to unconfirmed balance first. With 3 confirmations, the amount is transferred to wallet.


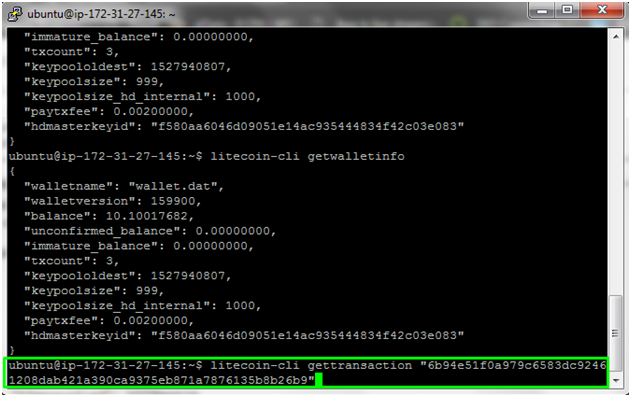
Step: 8
Checking the transaction with the transaction ID copied In step 6. Keep seeing the number of confirmations for the transaction repeatedly until it turns 3.
litecoin-cli gettransaction ”paste the transaction id”
litecoin-cli gettransaction ”6b94e51foa97936583dc92461208dab421a390ca9375eb871a7876135b8b26b9”

Step: 9
Checking from Cron
cd /var/www/html/cron
ls transactions/


You should see the transaction ID to make sure cron is running properly.

Step: 10
Checking in frontend Crypto wallet page
When the confirmation is 1, you will see under Recent Deposit with the transaction status as “Pending”. When the confirmation turns 3 the status changes from pending to “Completed”.


That’s it! Once completed, You should see the amount added in wallet.
